The fur adventure began with all of the planning and learning that was involved in me working with fur for the first time. Then after that came the cutting of the fur. This was not a quick process for me , and so here is what I did.
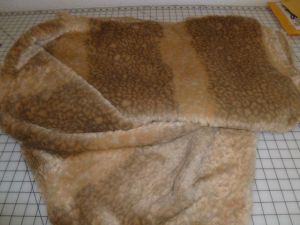
First, I needed to find out which direction the nap of the fur went. Then I needed to make sure that he nap of the fur went the same direction on each piece of the pattern that I would cut out. Next, I traced the pattern pieces onto the fur before I cut it out. I used a sharpie to do this. You might say that it was crazy of me to use a permanent black marker on my fur, but I wanted to make sure that I could clearly see the lines while cutting. I also knew that since I would be cutting on the line and that any remaining black lines would be caught up in the seam so it wouldn’t be visible once it was stitched up. I also made sure and used a fine point sharpie and I tried it out on a small piece of fur first to make sure it didn’t bleed through.
Because of the way the fur has to be cut, none of the pieces can be cut on the fold. So when I traced the back, I had to trace one side and then flip it over and trace the other side. After all the pieces were traced, the cutting started.
 Since I did not want to cut the hair of the fur, the fur had to be cut out with tiny snips of the scissors, very carefully, making sure to only cut through the backing of the fur. This was not difficult, but it was very time consuming.
When I had finally finished the cutting, I figured it would be clean up time, but with since I was not cutting much of the hair of the fur there was really only a small mess when I was done. Also, at this point, I was still happy with the pattern that I had picked. The jacket pattern that I chose is very simple and did not have a lot of detail to it. This was a bonus for me since I did not have to try and make any special markings on the fur. In fact, I didn’t even worry about cutting any notches. I figured I would not be able to find them in the fur later anyway.
 Next I cut out the lining. This was quick work since I was able to use my rotary cutter on it to cut it out.
At this point, I tried to pin a couple of the pieces of fur together, only to see my pins bend and twist. I was very frustrated at this since I am a big fan of pinning things together and I hate to sew with out pinning first. So to solve this problem I ending up using some large paper clips/clamps to hold the fur together. Not as elegant as using pins, but the paper clips did the job and held the fabric together.
Now that all the pieces are finally all cut out, it is time to sew!
Please be sure and join me in the next post in the continuing Saga of the Fur Wars…