 I found this fun sun top pattern on the internet. It looked just right for summer outings, so I decided that I wanted to make one for each for my co-workers tween daughters. This top is made as a front and back square, sewn into a tube. Elastic is sewn to the top to gather the tube to fit the body, and then shoulder ties are added to help keep the top on. Simple enough. The only measurement needed to make this top is an accurate chest measurement. I reached for this Stars and Stripes cotton print that has been hiding in the stash for as long as I can remember. And I hoped that this would give the girls something fun to wear on the 4th of July.
 I cut out 4 squares of fabric, 23 inches by 28 inches, for the two tops and 8 strips, 4 for each top, for the shoulder ties. The first step was to sew the side seams. Normally, I would have just serged the side seams to finish them up but the pattern called for french seams. I have read about french seams and seen videos for sewing them but I had never done a french seam. And I figured that I might as well learn something new while making these tops, so I sewed 4 french seams The french seams were very easy to make and leave a beautiful clean finish to the seams. In fact, you hardly notice there are side seams with the french seam technique.
Next came the shoulder ties. These were not difficult to make, just time consuming. There was a lot of ironing to make these ties. I folded the strips I had cut like bias tape by folding the edges to the middle and then folding the strip in half, then tucking the raw edges into the fold. Next I edge stitched down each tie. I learned a lot about folding the edges, ironing the edges and edge stitching by the time I had made 8 ties.
 I next stitched a 1 inch hem at one end of the tube and a 1.5 inch hem on the other. I added the ties to the larger hem as I stitched it and I placed the ties 8 inches from the side seam. I made a tab and placed it under the hem at the center back as a tag, and also to tell me which top was for which girls since their measurements are just a little bit different. I also left an opening for the elastic in this hem. I then stitched down the middle of the larger hem to make a casing for the elastic. This left a nice ruffle at the top. This ruffle is very cute and adds a nice touch at the top of the elastic. I cut the elastic to the chest measurements that the girl’s mom had given me plus one inch. I did not want the elastic so tight so that it cut into their chest when wearing the top. I also wanted the elastic just big enough to the make the gathers and hold the tube to their body. Lastly I pulled the elastic and then finished it off to complete the top.
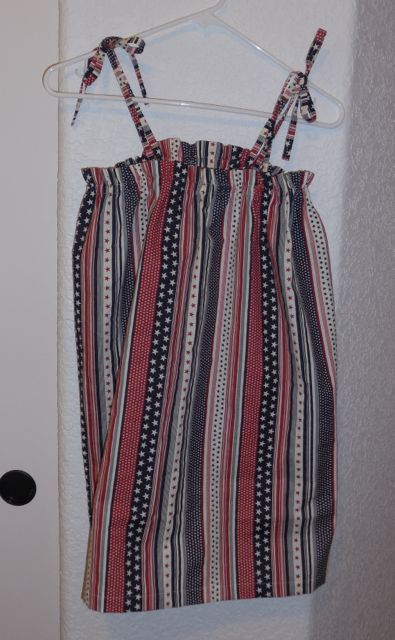 Upon completing the tops, I put one of the tops on a hanger to take pictures before giving the tops to the girls. It look terrible on the hanger. The ties looked too close to the center front and the tube looked like just that, a tube. I was very disappointed. I could only hope the tops would look better on the girls than they did on the hanger. Luckily, they did. The girls looked very cute in their summer tops, and they seemed to like them. The tops seemed a little long and I told the girls that I would shorten them, but they both said they liked the length. The smaller girl mentioned that her elastic seemed tight. I told her that was an easy fix and had her try on her sister’s top. She said that the larger size was a better fit. This really was an easy fix. I just unpicked where I had closed the elastic, removed the smaller piece of elastic, pulled in a longer piece and stitched it back up again. At work, their mom said the fit was great and they were already wearing their tops before the 4th of July. I was excited to hear that. I hope they will wear and enjoy their tops all summer long.
Until next time…
Happy American Independence Day and Sew forth and Celebrate On!
