Tag Archive | Cute

Drop Down the Cuteness – Part 2

DSCN0901The panda bear’s pattern was easy to follow so the crocheting of the pieces was fun and it stitched up quickly. Then something changed. As I began to stitch the panda bear together, cuteness did not burst from every stitch. What went wrong? Upon completing the panda bear, I sat the latest cute bear and the panda bear side by side and studied the differences.

DSCN0903
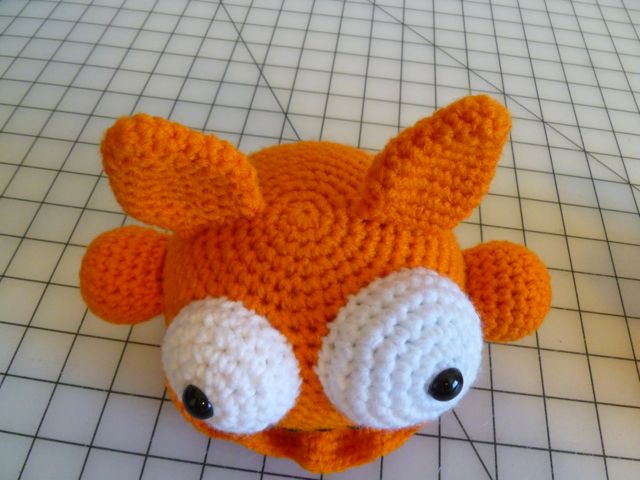
Of course there were the obvious difference in the bears, but as I studied their faces, my attention was drawn to their muzzles. Now, the size of the muzzles of these two bears are quite different from each other, but that is not what caught my attention. It was the placement of the muzzle on the head. The first bear has a big muzzle so it had to be sewn lower on the head, closer to the neck and the eyes needed to be inserted right above the muzzle. The panda bear had a tiny muzzle in comparison, so it could be stitched up higher on the head with plenty of room for a space between the eyes and the muzzle. Was the placement of the muzzle on the face in a different position the answer to the cuteness issue? Was the panda’s face just too high and separated on his head?

I turned to the pattern and, yes, the pictures showed the eyes and muzzle of the panda stitched lower on the head and closer together. I also pulled out the only other teddy bear pattern that has turned out cute for me as I crochet it, the pattern I used to make Madison and Tux, and, yes, because the head is crocheted sideways in this pattern, the muzzle is even with the neck and the eyes are inserted right above the muzzle. If my theory was correct, lowering the muzzle and placing the eyes closer to the muzzle of my amigurumi bears would bring out the cuteness.

DSCN0939I was excited to test my theory and make another amigurumi teddy bear with a lower muzzle and closer eyes, but first I had to try and fix this panda bear. I was not willing to unstitch his head and muzzle plus his eyes were already permanently snapped into place, so I crocheted him a bow tie. I found a free bow tie pattern for a dog on Ravelry and modified the size to fit the panda bear. The bow tie filled in the distance between the panda’s neck and muzzle making the neck and muzzle seem closer together. Whether it’s the illusion of bringing the neck and muzzle closer together or just that the bow tie is cute, adding the bow tie help bring out some of the panda bear’s cuteness that wasn’t previously there.

DSCN0942I did not have a quick fix for lowering the eyes to see if my theory on their placement versus the bear’s cuteness is correct. I will just have to place the eye closer to the muzzle on the next amigurumi bear I make and see if the cuteness appears spontaneously. I am betting it will.

I don’t know if my next amigurumi will be a bear or not, but I see I a bear with a lower muzzle and eyes closer to that muzzle soon in my future. Perhaps then I will know if that was truly the answer to bear cuteness or not. I hope it is and I will have another crocheting mystery solved.

Until next time, crochet on and cute on.

Drop Down the Cuteness – Part 1

DSCN0924I have finally just crocheted the most adorable teddy bear ever!

DSCN0927As you know, I seem to have an issue with crocheted teddy bears. I never seem to be quite happy with the end results once I complete one. It does not matter wether the bear is big or little, fat or tall, skinny or small. For some reason the cuteness factor is just lost for me once I complete the bear and I have to sit and study the bear before I think has any cuteness at all and I can finally accept my completed results. So why was this time any different?

DSCN0926I had pretty much given up on making any more amigurumi bears. I figured I would just stick to monkeys, monsters and such, but when I ran across this pattern, it looked so cute, I thought I would go ahead and give a teddy bear another try. The pattern was well written with lots of pictures, so it did not take long before I had all the pieces of this amigurumi crocheted up and ready to be stitched together.

As I stitched the pieces of this bear together, cuteness just poured from every stitch. From his thread jointed arms and legs to his little bob tail to his cute nose and smile, I just fell in love with him. This made him much easier to stitch together.

DSCN0932I would like to make a comment about the construction of this bear when it came to stitching his head and body together that might be helpful to someone else making something similar.

DSCN0933Because I had picked a variegated yarn with a color in it that closely matched the main color of the bear, I twisted this bears body before I stitched it on. Normally, I have the starts of the rounds on the back of the amigurumi. On this bear, that placed a big patch of the variegated yarn with the matching color on the very front of the bear and it looked odd. So, I turned his body until I had more variety of colors from the variegated yarn on the front and then I stitched the head and body together.

Since I was so happy with the end results of this bear, I picked another bear pattern, a panda bear, for my next amigurumi project. Stay tuned to see if I could get the same cuteness factor from this panda bear pattern too.

Until then, crochet forth and cute on!

Take Off That Hat And Scarf! It’s Still Summertime out there!

DSCN0243I must have been trying to think of cool thoughts while enduring the heat of the summer when I decided that my next amigurumi project would be a penguin.

Actually, a more accurate reason for choosing it was the purchase of a particular color of variegated yarn. I love the extremes of it. First a bright neon color then the complete opposite, black, then the bright neon color again. What would show off the burst of colors in this P1040325yarn? Of course, an animal with the same contrast, a black and white penguin.

I found the cutest penguin pattern and it included instructions to make a hat and scarf too. The crocheting of the pieces went smoothly, and the pattern was very well written with lots of detailed pictures. The only change that I made to the pattern was the penguin’s white belly spot. The pattern called for just a round white circle for the belly spot, but that looked odd to me. So, I undid the last round and added some double crochets to what would be the top of the spot, making it an oval at the top and round at the bottom. This looked better to me than just the round circle did. The oval top seemed to fill the belly area of the body better.

P1040335Stuffing and stitching the pieces together went smoothly as well. Soon enough, I had an adorable penguin all crocheted up! I actually thought about stopping there, but the whole reason for making this amigurumi was to use the new variegated yarn, so I started crocheting again to make the scarf and hat.

The scarf was no problem to crochet and it was a good length after being tied around the penguin’s neck. The hat was also a simple crochet to make. There is one thing I thought about changing on the hat and that was the color of the last round of the cap. The last round is crocheted in double crochet versus the single crochets of the rest of the cap, to give the cap a finished edge. This edge is lost when made in the variegated yarn. I thought about undoing the double crochet round and chaining the color to black. But I figured that would that just make the double crochets blend with the penguin’s black head and I would lose the edge anyway. In the end, I decided to leave the double crochet round in the variegated yarn, mostly because I love this variegated yarn on the black and white penguin.

DSCN0241The challenge for this amigurumi came with the pompom on the hat. I know how to make a pompom, but I have never had any luck making a successful one. They always fall apart on me. I thought about leaving the pompom off the hat but I really wanted one so I got started on it. After trying a couple of times to make the pompom and having it fall apart on me, I was ready to quit. So after filling the bottom of the garbage can with failed pompoms, I decided that the hat did not need a pompom after all. I showed the husband the completed penguin with the pompomless hat and scarf and his first comment was “Where’s the pompom?” Flustered I showed him the garbage can and explained to him how I had been trying to make the pompoms with no success. He said to let him try. I watched closely as he did the exact same thing that I had done to make a pompom, DSCN0247but when he pulled the yarn to tie the knot, he pulled it so much tighter than I could have had pulled it, I found my problem. The husband’s pompom was a success and I promptly stitched it to the top of the hat for the penguin. It looks great and best of all it did not fall apart. Unfortunately for the husband, he is now the official pompom maker.

This penguin was quickly named Paulie, not a very original name, but a good name. I think Paulie is very cute and was fun to make and I love his hat and scarf from the variegated yarn the most.

Until next time, crochet forth and crochet on.

Experimental Monsters

P1030333P1030332I remember when I had first started crocheting amigurumi’s, and all my animals had tall pointy heads. And I remember how I learned that the reason my amigurumi’s had tall pointy heads was that I was only crocheting in the front loop of the stitches instead of both loops. And I also remember that once I learned this lesson, and started to crochet in both loops instead of just the front loop that my amigurumi’s heads and body parts turned out flatter but rounder the way they were suppose to. And after remembering all of that, then you will understand my trepidation when I started my next amigurumi project.

.

P1030318I found some patterns online for some fun amigurumi monsters. I love monsters, so here was my next project. I chose the pattern named Lark, one of the smaller monsters to try first. Upon reading the pattern, the author said to crochet the entire monster in the back loop only (BLO). What? This went against the lessons I had learned before. Wouldn’t my monster come out tall and pointy, not cute and round? Contemplating the construction of the monster, I figured that the author of the pattern must have designed the pattern that way and she also clearly said that if you crocheted in both loops that your monster would not be the same as the picture. So, I decided I P1030317would crochet this monster in the BLO even though that was going against what I had previously learned and see what I got.

.

When I picked up my favorite G hook to start crocheting, I completely forgot about only crocheting it in the BLO. It wasn’t until I had crocheted both arms, ears, and eyes and had a good start on the body when it dawned on me that I was not crocheting in the back loop only. I thought about undoing all that I had crocheted but then I had a brilliant idea. I would continue making this monster crocheting in both loops and then make a second monster, of the same size and using the same hook and the same yarn, but crochet it in the back loop only P1030319and see just how much difference there was between the two. I would do a little experiment to see which way I like the monster best.

.

I finished crocheting the parts for the monster in the both loops and then I crocheted the parts for the monster in the BLO. Both were easy and fun to crochet as long I kept reminding myself BLO, BLO, BLO. Next, came the stuffing and stitching together. They both stuffed easily. This was not a complicated pattern. But, when it came to sewing the parts together, it was easier to stitch the arm and the eyes on to the BLO monster. The arms on the both loop monster were short and stumpy which made it P1030321more difficult to sew them on and the eyes of the both loop monster were flatter, so I had to hold them in a cup shape as I sewed them on. But, when both monster were done, they were equally cute. So what I learned was that, yes, the author of the pattern did adjust the pattern for crocheting in the BLO, but that in the case of a monster that does not have a specific look, it did not really matter too much in the end. That might not be true for an actual animal pattern. If the author has adjusted the pattern for BLO crocheting and you choose to crochet in both loops then your animal may come out looking a little funny, like my first pointy headed ones did.

.

P1030314With these monsters done, I named them Mark and Clark. Mark is the older monster brother crocheted in both loops. He has the straighter smile. Clark, the younger brother, is the monster crocheted in the back loop only. He has the crooked smile. Clark also has ridges because of being crocheted in the back loop only. The ridges are formed from the exposed front loop. I asked the husband which one he liked better and he said he liked them both, but he really liked the ridges on Clark better. I can not pick which one I like best. I think they are both fun, silly monsters and I can’t wait to start the next monster pattern.

From the top of the Charts!

circularchartsThe patterns that come in my Crochet Today magazine have both written text instructions and a chart using symbols to show you how to crochet the pattern. In the past I have always promptly ignored the charts, and instead chose to follow the written text instructions to crochet my projects. That was about to change though. A few days back while I was searching for crochet patterns on the internet, I found a great Japanese web site with several great free patterns to crochet, P1020718but the patterns were all in the chart form. The instructions for each part of the amigurumi’s are in two charts. The first is a table with the count of each row and how many stitches are in each row, and the second is a chart with symbols. Great, I don’t know how to read those! And so I quickly decided that I wouldn’t be making any of those patterns anytime soon. But after I had thought about it awhile, I decided that the teddy bear pattern was so cute, that it was time to learn how to read and follow the symbols of the charts.

.

P1020720At first, I only followed the table in the patterns. Because I have made enough amigurumis in the past I know how to increase from 6 to 12 to 18 to 24 and so on per row without really reading the instructions or, in this case, without following the chart. But, as soon as the pattern became more complicated, I had to finally learn what the symbols meant and how to follow the chart. To my surprise, it was very easy to follow the symbols of each row, and soon I found that I was no longer watching the table with the stitch counts, and I was just following along with the symbols on the chart. It was great! A whole new batch of patterns were now available for me to download and try out. I don’t know that I am ready for a really complicated chart pattern yet, but I am willing to try some more pattern that are just charts.

.

P1020726As for the pattern I chose to start with, I was very unsure about the resulting pieces of this teddy bear while crocheting it up. I knew that I had followed the table and chart correctly, but I did not like the looks of the finished pieces. First came the head. When I was done crocheting the head, it was very flat and fat. I felt like I needed to add at least three more rows in the middle to make it taller. Then I studied the photo of the bear very closely and decided not to add the extra rows and just see what I got after I stuffed the head. Next came the feet. The feet came out huge and even much larger than I expected even though I knew I followed the table and chart correctly. But I didn’t know how to fix them, so I left them the way they were.

.

After finishing the crocheting of the pieces of this bear and after stuffing the head and adding the muzzle and eyes, I felt a lot better about this look of this bear. Stuffing the head, helped to make it look taller, and made it look less fat. Stuffing the feet, made the feet look even bigger but I liked the big feet better after they were stuffed for some reason. And after stitching the legs and arms to the body and adding the head, I sat the bear down and fell in love with it. I really like the variegated yarn that makes it look like the bear has a sweater on and especially the white strip on the top and bottom and around the arms that encases the variegated yarn to give it a even more of a sweater look.

.

.

P1020729P1020724As the bear sat on my table waiting for pictures, he fell over. When I picked him up, I noticed just how ugly he really was especially his big feet. Where had the cute bear I was in love with gone? I sat the bear up and there he was. The cute bear had returned. It did not take long for me to figure out that I really like the bear sitting upright but not laying down flat. I picked the bear up by his ears and folded his feet up to his body, cute. I let his feet drop, not cute. Folded the feet back up, cute. Let them drop again, not cute. The husband says I am crazy, that the bear is just as cute sitting or standing, but I have to disagree.

.

I have named this teddy bear Sebastian and he is currently SITTING on my sewing table, but he will have to find a new home soon. Hopefully some one will want to love him even with those big feet.

The Headless Cow, Man!

P1020618 Or as Bart Simpson would say: “Don’t have a headless cow, Man!”

Roxie, the amigurumi cow I recently finished, has made her way into my heart quickly. She was just a couple of hooves when I decided she was just going to be too cute, and would be living here with me next to T-Bone and Three Eyes. When I first found her pattern, I fell in love with the pictures of her, and I was very excited to make her. The author of the pattern said to use whatever size yarn and hook you wanted and did not give a finished size, so I again turned to my favorite G hook and started crocheting.

P1020595I made the legs first and then the body because the legs are crocheted into the body, rather than being attached later as most patterns call for. With the legs and body completed and stuffed, my crocheting got interrupted and a headless cow sat on the sewing table for awhile and drove the husband crazy. He could not leave the headless cow alone and talked about it all the time. “Well that’s some disturbing news but not as disturbing as that headless cow in there.” he would joke or how about “I had a nightmare last night and in it a headless cow was after me.” Soon after the headless cow was flying around the sewing room with the husband’s assistance, trying to scare me as I worked.

By this time, the husband was having just too much fun with the whole headless cow thing, so I finally tucked the body into a drawer until I could finish crocheting her head and get her finished up. I think the fact that our Halloween trip was just a few weeks away was getting to him. We always go to Disney for Halloween every year, and they always do a re-enactment of the Headless Horseman of Sleepy Hollow galloping down Main Street USA right before the Boo to You Halloween Parade starts.P1020620

P1020628The cow’s udder was the most fun part to crochet for me. The teats are made from popcorn stitches which I had never crocheted before making her, so I ended up learning a new stitch while making this cow pattern.

Roxie turned out much bigger than I had expected her to be, but her size is fine with me. As I have said before, I like bigger amigurumi’s. They are just more fun to make for me. I ended up using some white leftover yarn I had from making  T-Bone the skeleton to make Roxie. I believe it is Caron brand yarn, and it seemed to be thicker than the last skein of Red Heart yarn I used. I am sure that the heavier yarn added some to Roxie’s size. If and when I make another cow, I will use a different brand of yarn but I will still use the same size hook and I will expect to get about the same size cow.

Well that is it for this week’s adventures in yarn! I think that Roxie the newly headed cow turned out as cute as could be, but the husband is a little sad that he cannot make any more headless cow jokes.

Bosom Buddies

Who would have thought that a dog and a bird could be such good friends for so long. Luckily for all of us, Charles M. Schulz did and the completion on my current amigurumi simply reconfirms the fact that Snoopy and Woodstock are meant to be friends forever.

Due to my disappointment in the finished Woodstock, I almost did not finish the Snoopy pattern from the same author I had previously started before I made the Woodstock. I finally decided that it would not take much to finish Snoopy so I started crocheting. I found another error in the pattern count for a grand total of 4 miscounts I had to correct on the pattern. This really ruffled my feathers. I paid money for these patterns and expected the author to make every effort to have the counts correct.

 .

I would make some of the same changes to the Snoopy pattern that I would change on the Woodstock pattern. I would like his nose and arms longer. I like Snoopy’s feet much better than Woodstock’s feet, so I don’t know if I would change them as I would Woodstock’s feet. I disliked Snoopy’s neck as much as Woodstock’s neck until I attached Snoopy’s collar. Snoopy’s collar lifts up his head and hides the stitches at the neck. I thought about putting a collar on Woodstock to see if I would get a same effect, but decided that a collar on Woodstock just wouldn’t look right.

 .

Now that both amigurumi’s are done and they are sitting on my table side by side, I can finally say that I like my end results well enough. Alone, I do not like either pattern very well, but together they match and are very cute. The things that I see as a problem on each individually, are not there when they are posed together. I am so happy that I finished Snoopy so that Woodstock would have a friend and find his place in my heart.

Meng Long – The Fierce Dragon Panda Bear

After perusing my usual crocheting web sites, I noticed that many people were crocheting amigurumi panda bears in various shapes, styles, and sizes. All the panda’s looked so cute that I decided I wanted to make one too. So, this is Meng Long. His name means fierce dragon but I don’t really find anything fierce about him. I think he turned out super cute, and is just adorable.

.

.

Meng Long’s pattern came from the book Amigurumi Two by Ana Paula Rimoli. I used the “toys in pajamas” pattern. I have made this pattern a couple of times and just love it. It crochets up quickly and easily and the end results are  always cute. I really like the shaping on the hands and feet of this pattern.

.

The time limiting factor in Meng Long’s construction was the details on his face. Did I want to use felt or crochet rounds for the black of his eyes? Did I want to add white felt to the eyes as well? Did I want to crochet him a muzzle or just use felt for his nose and mouth? If I crocheted a muzzle, did I want to use a plastic nose or embroider a nose to the muzzle? I finally decided to stop asking questions and just try a few things out. So, with that, I got started.

.

I liked the felt on the eyes better than the crocheted rounds right off. And I decided on blue eyes early in the process even though I know that pandas do not really have blue eyes naturally. The white felt on the eyes was a must. It took a long time, with lots of trimming, and several tries to get the felt shapes I wanted for the eyes, but the end result was worth the time and effort. I crocheted a muzzle but it took only a couple of minutes to decide that I did not like it with the muzzle. I decided I wanted him to be cartoonish cute, and not look very realistic in the end. I embroidered  his nose square, but the husband said to add the point at the top of the square. After adding the point, I agreed with the husband. It looked better that way. The crooked smile I made him with was my idea though.

.

 .

After the face was designed,  Meng Long just needed to be stitched together. The stitching together of the parts went smoothly. I did not rush the process. I took my time to do it right, which kind of made it fun to see him come together. I decided to stitch his arms and legs closed and then stitch them to his body. This way he can sit down, but it is harder for him to stand. This is ok because I designed him as a toy to be  played with, and not a decoration to be displayed.

.

Meng Long is having a great time in the sewing room playing with Sarah and the other amigurumi’s hanging out in there, but he needs a home of his own where he will be loved and played with.

Sarah B

This is Sarah B. The B, of course, is for brachiosaurus. She is my latest completed amigurumi project.

Sarah’s pattern is from an old book my sister gave me called Crochet Dinosaur Park Nursery. It was an American School of Needlework Book #1177 and it was published back before the term amigurumi became popular. This book contains the pattern for 4 dinosaurs, with each pattern having a larger adult version and an smaller baby version of all 4 of the designs. I decided to make the adult brachiosaurus first.

.

When I first read the pattern, I thought to myself “No, way. This pattern is too weird.” But I decided to make some changes to the pattern and gave it a try. The pattern called for two hooks to make it, with the main hook being a size K. I don’t know if I even own a size K hook, no less used one to make any amigurumi. Wouldn’t a larger hook make larger holes in the crocheting for the stuffing to come out of? To fix this, the pattern called for two strands of yarn to be used at a time. I have never done this before either. If I followed the pattern, it said that my brachiosaurus would be 27 inches long. What?!? That is over 2 foot long. I want a brachiosaurus, not a monsterasaurus. Plus I only had one skein of yarn in the color I wanted to use. About ready to fold up the pattern and say forget it, I decided to use a size H hook with 1 strand of yarn and see what I got. If I did not like the results, I would just abort the project.

.

So I got started with one of the feet, my H hook, and a single strand of yarn. I followed the pattern and got the cutest little foot, so I crocheted on. I followed the pattern and made all four feet, the tail and the body. I continued to follow the pattern through the head to the neck. At the crook of the neck, the pattern calls for the rows to be half hdc and half slip stitches. I had a really hard time crocheting this part. Although I followed the pattern, if I make another brachiosaurus, I will modify this part of the pattern to make it easier to crochet. At first I was not sure how to crochet the head bumps and thought about just leaving them off, but I gave the pattern a try and they turned out to be very simple to crochet.

.

The eye lids were not that easy. The second hook the pattern called for was to make the eye lids. Since I had used a size H hook for the pattern, I got out my F hook for the eye lids. I followed the pattern and got an eye lid that was too short to curve around both eyes but too long for one eye. I undid this eye lid and made a shorter one to fit around just one eye. I did not like the height of this eye lid so, I started again, and just slip stitched across instead of sc. I liked the results in the height but length was still wrong. The next try was the charm. I got the length and the height I liked, so I made a second one the same way.

.

Unfortunately, one of the biggest challenges in making this brachiosaurus was the yarn. Well, to be fair, not the yarn but its dark blue color. I had difficulty seeing the stitches well and I had to turn on extra lights while crocheting and sewing it up. It was certainly not the pattern or yarns fault, but it wasdisappointing to me none the less.

As I mentioned on another post, the sewing together of this brachiosaurus was made much easier with pins, so the sewing together was not the dreaded chore it has been previously. I did spend some extra time on the details. I tried several different looks, head bumps no eye lids, eye lids no head bumps. I finally decided on both head bumps and eye lids. I embroidered her mouth and nose with black yarn as the pattern called for with the dark blue yarn but you could not even see what I had stitched. So I dug through the yarn stash and found this nice gold yarn to match the eyes and the end result is much better.

.

As I crochet an amigurumi, it takes on a personally all its own, sometimes quickly during the crocheting and sometimes not until the very end. From the first foot to the final eye lid, this dinosaur turned out so cute and took on a feminine quality almost immediately. I struggled with this a little. Dinosaurs are usually boys, not girls, but Sarah is all girl and I have just fallen in love with her. I do not have a place to put her so I must find her a home, but I will have a more difficult time parting with her than some of the other amigurumi’s I have made.

Mixed Up Monkey

I found this monkey pattern on Ravelry.com and fell in love with it. I printed out the pattern and it quickly made its way to the top of my to do list.

Excited about crocheting this monkey, I went to the yarn stash but could not find the correct brown colored yarn that I had pictured in my mind for this monkey. Flustered, I checked out the local places I have to buy yarn but I really did not find what I was looking for. Then I ran across this variegated yarn and decided it would work ok. I was not thrilled about it, but it was better than anything else I had found. For the accents, I picked the cheap tan brown yarn I had used to make Calli the bear,  a while back. I did remember that I really did not like this yarn as it has no stretch, but decided to use it anyway. Boy, I could not have picked two different acting yarns. The variegated Vanna’s Choice yarn stretched quite a bit as I crocheted, and the cheap tan yarn did not give at all. In fact, the variegated yarn gave too much. When I stuffed the monkey, the variegated yarn showed larger holes in the crocheting than I like.

.

As far as the pattern goes, it is very well written. I had no problems following the instructions, and the body parts turned out just like the picture showed. I did make one modification to the pattern. Row 1 started with 8 sc in the ring. I knew this was going to make a large hole at the start of each body part, as I learned from Blue, the giraffe. So, I made the first row 4 sc in the ring and row two 8 sc, increasing each body part by one row. I am pleased with the end results using this technique and will try to remember this lesson on other amigurumi’s I make later.

I think I overstuffed this monkey though. As I crocheted the body parts, I pictured this monkey being a rag doll monkey, his body hanging in a floppy lump as he is carried by his arm. I stuffed the body and the head firmly but only stuffed the arms and legs at the base. I got the effect I was looking for from the arms and legs but the body and head is too full to hang flopply as I had envisioned.

.

As usual, I was not happy with the results as I sewed the parts together, partly because of the stuffing problem, but as he reached completion, he turned out as cute as could be. His ears made all the difference. When I attached the ears, he took on his own personality and his cuteness really popped. I want to make another monkey though and see if I can get the rag doll look I was going for. This monkey’s pattern came with a banana pattern. I have not tried it yet but I will. He needs a banana. He also needs a name and a home. Any suggestions?